
For Elaine
No one in their right mind makes soup in the summer, unless it’s Vichysoisse or gazpacho or a fresh tomato with saffron and rice (Julia Child & Simone Beck’s Mastering the Art of French Cooking – Volume Two – p. 20, “Potage Magali”).
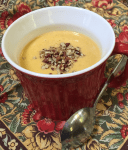
Ha-ha-ha! You thought I was going to say, “except me” but, no, even I don’t make soup in the summer. I will pull it out of the freezer and reheat it. And on this hot summer day, I have pulled out one of the heartiest, Butternut Squash.
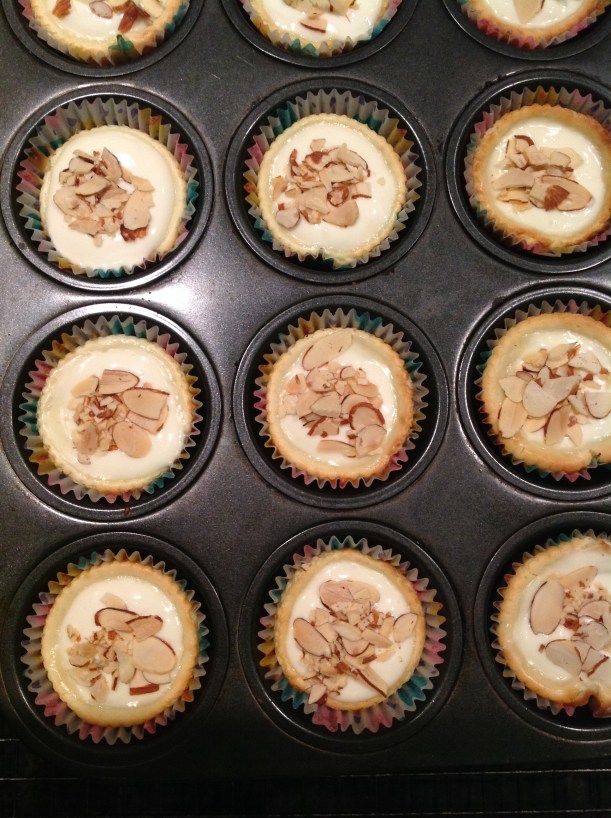
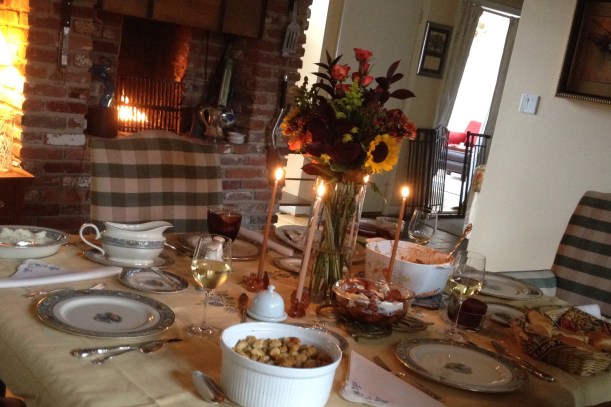
I only make it once a year, in the fall, in time for Thanksgiving, because it seems so Martha Stewart-y to serve my guests the first festive course in tiny little demitasse cups in front of the fire in my living room. I only give you a miniscule serving and pour the remainder into zippered freezer bags to enjoy throughout the winter. I’m selfish that way.
When you make something only once a year and don’t use a recipe, you have to rely on your sense memory to get it just right. But much of cooking is sense memory, isn’t it? How did it smell? How did it taste? How thick was it? Creamy or chunky? Tart or sweet?
I can still taste a dessert that I had at the Hôtel Albert Ier in Chamonix in 1989. I’ve never had anything like it since. I was so delirious from the experience that I stole the menu and had to dig it out to get the name. The hotel and restaurant are still there, but the website doesn’t offer current dessert features.
I saw the words “vanille,” “glace” (ice cream), and “miel” (honey), but when I tasted it, I was transported to every Christmas of my life. I said to the waiter, “What kind of ice cream is this? It tastes like Christmas!”
“Madame, it is from the Christmas tree, the juice of the pine tree.”
Being frozen, it had no scent, so I was completely dazzled that the taste and not the aroma brought up the memories. (Yes, I understand that smell and taste are linked, thank you.) We’ve all smelled Christmas trees and candles and potpourri and soap, but I’ve never put them in my mouth. Googling the phrase “miel de sapin” from the menu, I see that it more accurately means “fir” or “spruce,” and my family always had a blue spruce tree. So, there you are! Although I have never seen it on a menu again, I can still taste it.
So, now I’ve been asked to share my recipe for Butternut Squash soup, and I must give you my disclaimer. I remember what I put in it and the process, but I’m not certain of the exact quantities, because I only make it once a year. I know, I know what you’re saying, “I hate those people who say, ‘oh, I just throw in a little of this and a little of that.’” But it’s true. Give it a try, taste as you go along, and adjust it to make it your own.
How often do you make something and think, “What’s not-quite-right?” If the Granny Smith apples make it too tart, add a little more brown sugar. If you don’t like spicy, omit the chipotle and/or cool the heat with a little extra cream. Don’t use alcohol? I use it to add depth and richness. Maybe another parsnip.
[Your Name Here]’s Butternut Squash Soup with Chipotle – makes 4-5 quarts
[Chipotle powder lends a sweet, smoky flavor to the soup, but use it sparingly. I once used too much and had to pour heavy cream into the soup every time I reheated it. What a shame!]
2 pounds peeled butternut squash chunks (I buy 2 pounds already peeled and cut into chunks.)
2 large Granny Smith apples, peeled, cored, and cut into chunks
2 large carrots, peeled and cut into chunks
2 large parsnips, peeled and cut into chunks
½ cup coarsely chopped sweet onion
2 quarts unsalted, fat-free chicken stock
¼ cup dark brown sugar
¼ teaspoon freshly grated nutmeg
⅛ teaspoon powdered cloves
⅛ teaspoon ground allspice
⅛ teaspoon cayenne pepper
pinch of ground chipotle powder (or to taste, a little goes a long, hot way)
2 Tablespoons dark rum
1 Tablespoon very dry sherry
1 Tablespoon Armagnac or cognac
1 cup heavy cream
Optional garnish: toasted, chopped pecans; crumbled, fried & drained Andouille sausage; duck confit
 In a 6-quart stock pot, combine squash, apples, carrots, parsnips, onions, and chicken stock. Bring to a boil over medium heat. Reduce heat to low and simmer until parsnips are tender, about 20 minutes. Using an immersion blender, blend the apple-vegetables until smooth, making sure that any “strings” of parsnips are removed or blended. (Alternatively, you can remove the apple-vegetables from the broth and blend in a food processor or blender, with a little of the broth, until smooth.)
Over low heat, stir in sugar until well-blended, then stir in nutmeg, cloves, allspice, cayenne, and chipotle (to taste). Stir in rum, sherry, and Armagnac. Simmer 10 minutes.
Stir in heavy cream and heat without boiling. Adjust sugar, alcohol, spice, and salt to taste.
Ladle into individual containers and garnish, if desired.
And if you’re into wine, I always serve it with a Gewürztraminer.
When cool, ladle into freezer bags or containers. Reheat and then garnish.


 mart cook always has certain staples in the pantry or freezer. Besides the obvious, like flour, sugar, onion, garlic, celery, carrots, butter, and milk, there are some things that I always have on hand: tomato sauce, tomato paste, French onion soup and various broths (chicken, turkey, Thai), dried pastas and rice, frozen peas, frozen hamburger, steaks, and chicken breasts, frozen puff pastry, frozen nuts (walnuts, almonds, pecans, and pine nuts), shredded cheeses, and albacore tuna in water. Always. I can concoct a gazillion recipes from that combination.


 ‘Tis the season to party, and this is a big weekend for me, a tea, an open house, a dance, and a concert reception. Ideally, I would contribute “finger food” to the refreshments at three of the events, so I’m trying to kill four birds with one stone, because, as you know, I am essentially lazy.
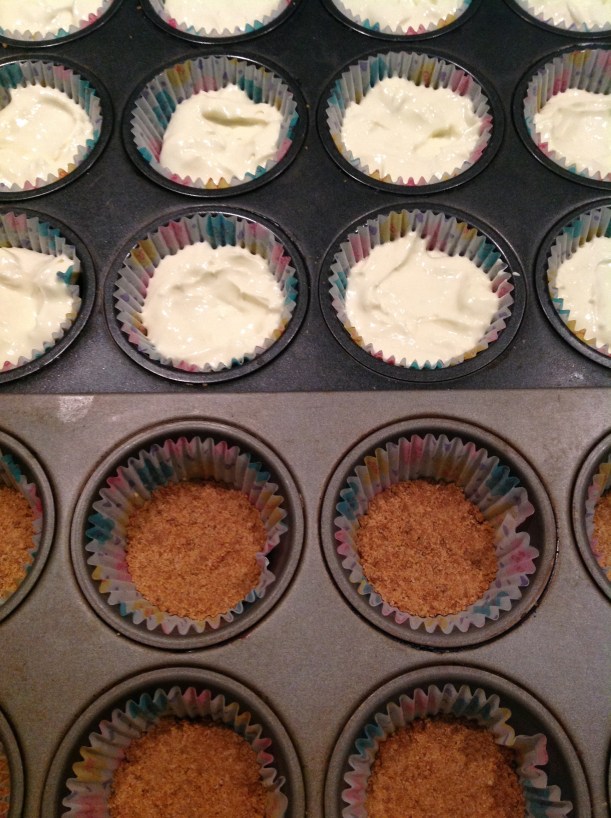 Filling
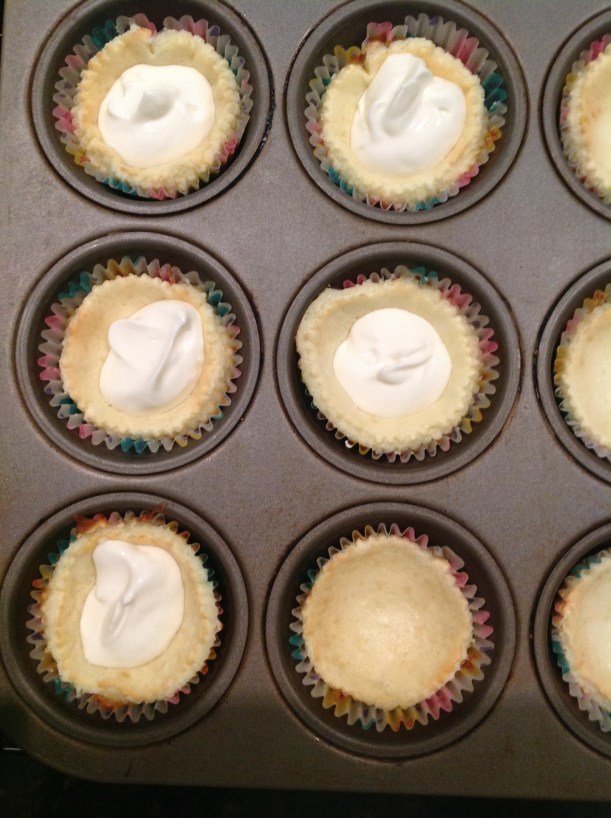


